
PayU has always been at the forefront of payments in India with innovation at its core. In tune to this, PayU has come up with Industry first payment solution for MS Excel. Presenting the PayU Payments Plugin For MS Excel – The Easiest Way to Collect Payments directly from your Excel sheets.


Do you remember any day ending without you opening Microsoft Excel? I bet it will be a big no! Microsoft Excel has become such a part and parcel of any business that it is often used for simple to complex things like:
- Scheduling
- Accounting
- Tracking Product Sales
- Tracking Business Sales
- Storing Customer Database
Now, with PayU Payments Plugin For MS Excel, you can also include “collecting payments” to the list of things you do every day on Excel.
All this and more with No license purchase, No setup cost and No technical integration required from your end at all.
Read on to find how using PayU Payments Plugin For MS Excel to collect payments is as easy as using an Excel:
Quick Links To This ‘How To’ Guide
Click To Install and Other Easy Steps To Start Sending Payment Links
Before we begin with the steps to installing and using our plugin, check these requirements off your list to use PayU Payments Plugin for creating and sending payment links from your system:
Requirements
- Windows 7 & above
- MS Excel 2007 & above
- MS Visual Studio 2010 Tools for Office Runtime & above
- .NET Framework 4.5 & above
- Internet Connectivity
- Basic knowledge of MS Excel
How To Install PayU Payments Plugin For MS Excel
Before you download PayU Payments Plugin For MS Excel for FREE, please check out How To Install PayU Payments Plugin For MS Excel on Windows 7 & Windows 8 & above.
How To Register With PayU Payments
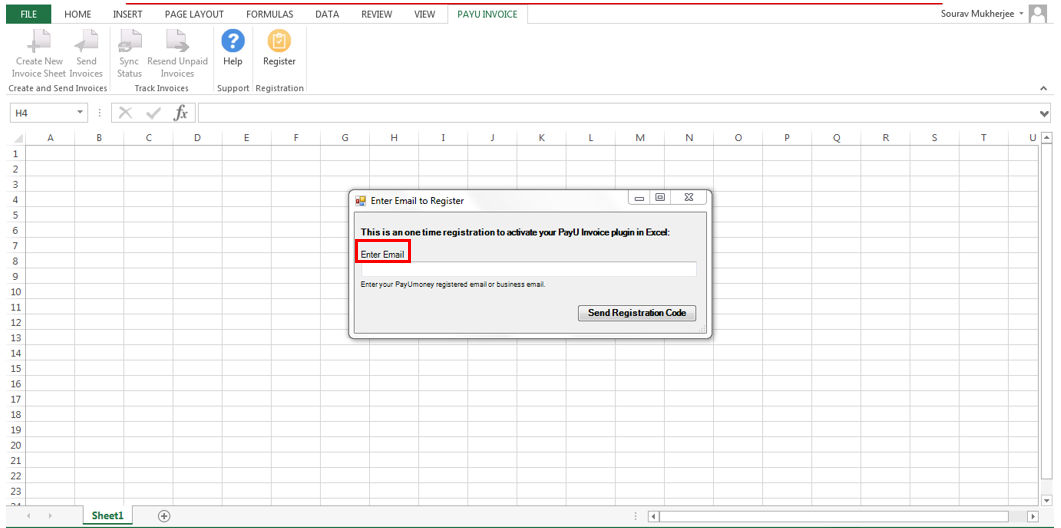
1. After installation, when you open MS Excel for the first time, you will get a pop-up asking you to register with PayU. If you are an existing PayUmoney/PayUnow merchant then enter your business email ID, with which you would have Signed Up.
Please note: If you are new to PayU then you will be onboarded as a PayUnow merchant. Please check sub-point 5 for further information.
2. If you closed the pop-up window, you can find the ‘PayU Invoice’ button on the top right side of the menu. Click this button to find two clickable buttons (Register and Help).
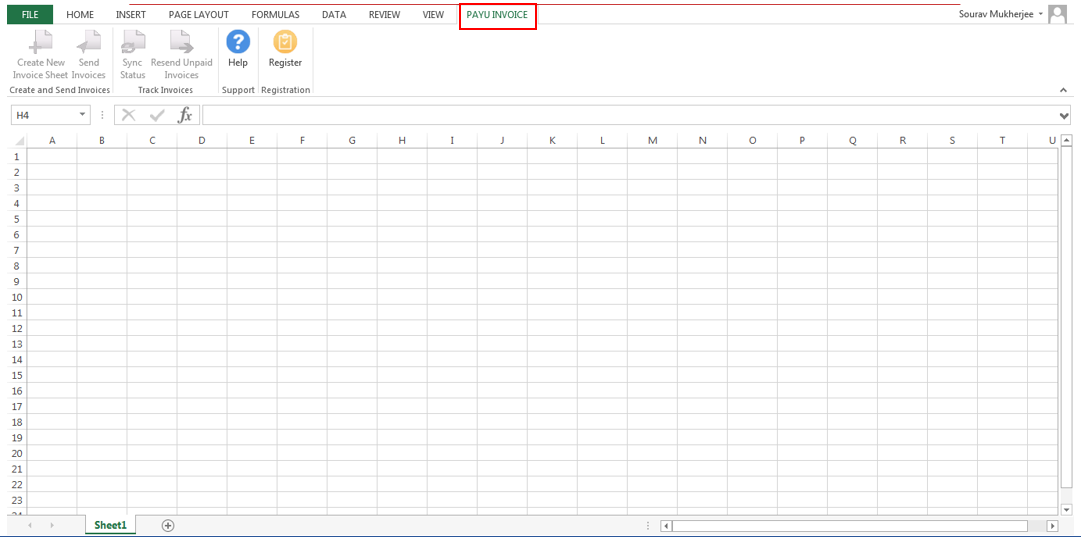
Please note, that unless you register with us you will not be able to create payment links.
3. Now, enter the ‘Business Email ID’ in the field provided and click on ‘Send Registration Code’.

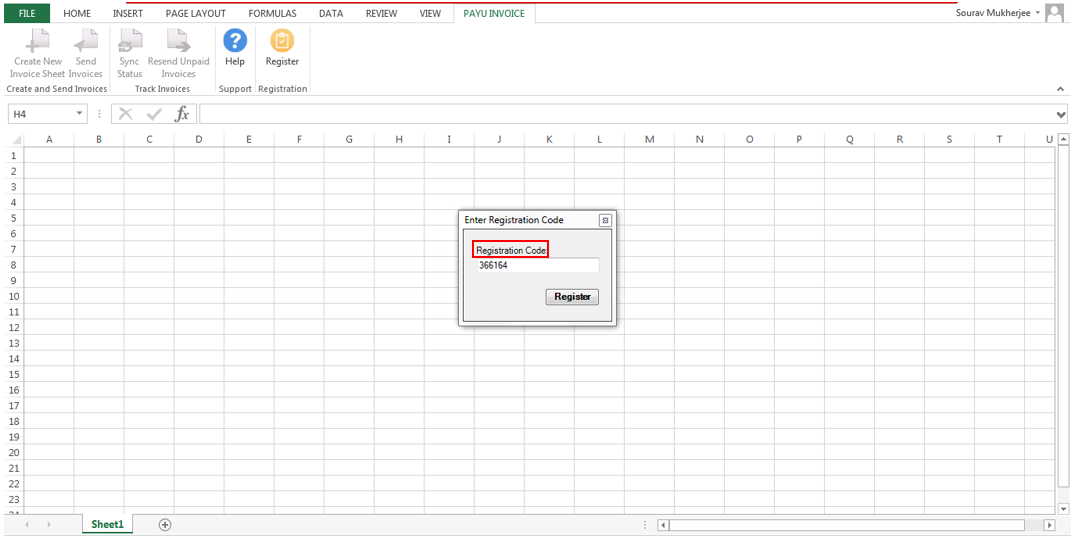
4. Check your registered email ID for the registration code and enter it to verify your account.
5. If you are not an existing PayUmoney/PayUnow merchant:
- Enter your ‘business email ID’ in the provided field
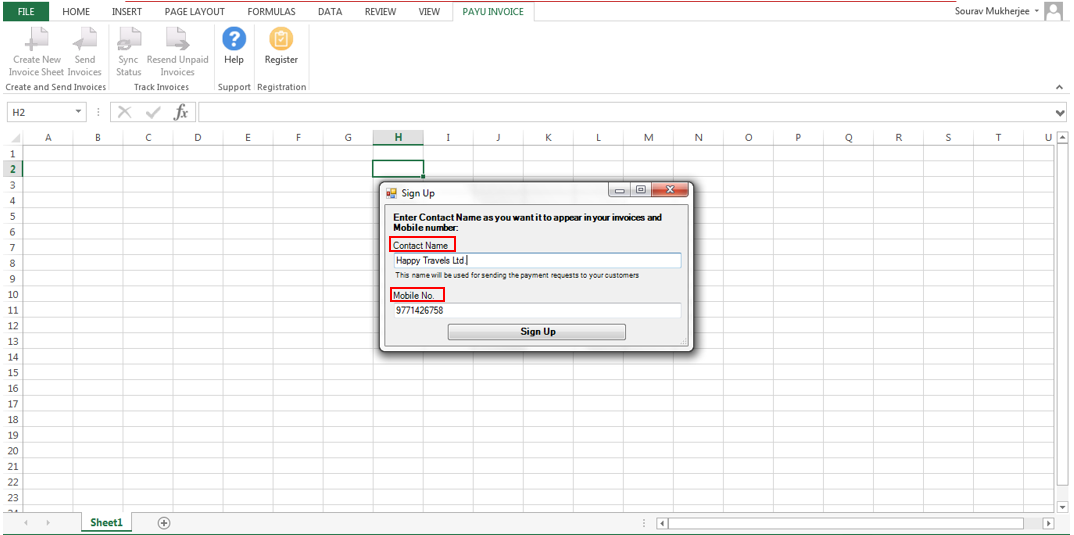
- Now, enter your ‘Mobile Number’ and ‘Contact Name’. Please note that this name will be used to send payment links to your customers. For example, if you enter ‘Happy Travels Ltd’ as the name then your customers will get a payment link saying ‘Happy Travels Ltd’ has requested Rs. 2000
- Then, type in the ‘OTP’ which you will receive in the ‘mobile number’ and ’email Id’ you entered. Please note that this number is valid only for 5 minutes
- Now, you can start using PayU Payments Plugin For MS Excel

Please note that to receive customer payments into your bank account, you need to complete the onboarding process by login into ‘PayUnow Dashboard’ and verify your bank account. Watch this video How To Link Bank Account With PayUnow To Accept Customer Payments In Your Bank Account to know more.
How To Create & Send Payment Links and Track Payment Status
1. After registration, click on ‘PayU Invoice’ button in the top menu bar to find a new clickable button, ‘Create New PayU Invoice’.
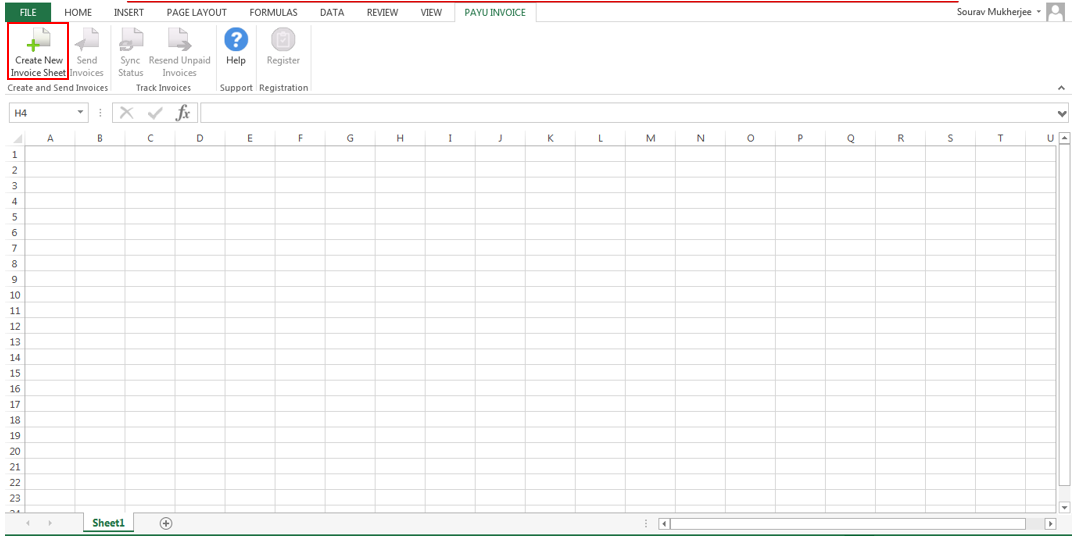
2. Just click on that button to get a new workbook with 2 sheets, ‘Add Invoice’ and ‘Invoice Status’ and instructions on how to use.
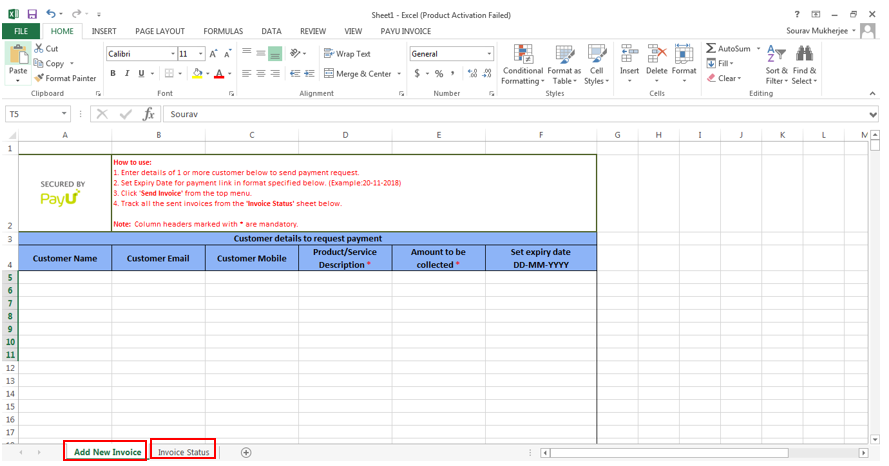
Please note: Invoice Status is a locked screen and you will not be able to make any changes on this sheet
3. Enter the details of one or more customers. Start with ‘Customer Name’, ‘Customer Email’, ‘Customer Mobile Number’, ‘Product/Service Description’, ‘Amount to be collected’, & ‘Set expiry date’ (for the payment links).
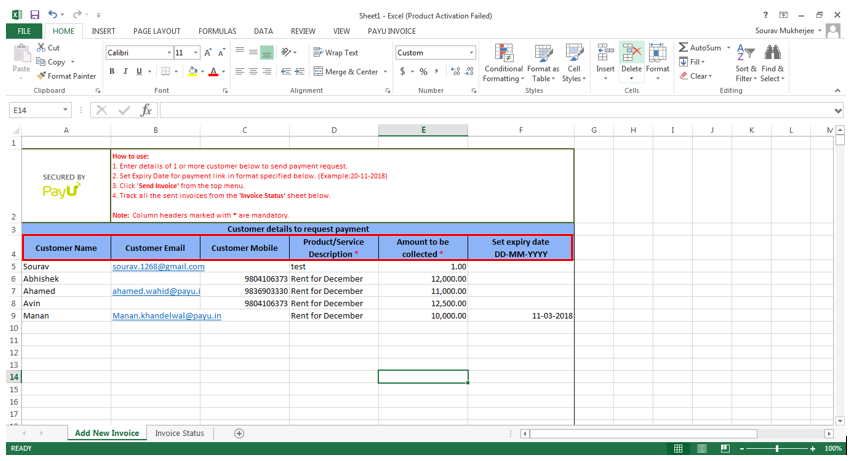
Please note that once you enter all the details, another command button in the menu becomes clickable and that is ‘Send Invoice’.
4. Now, click on ‘Send Invoice’ button and see a status bar showing that the invoices are being sent.
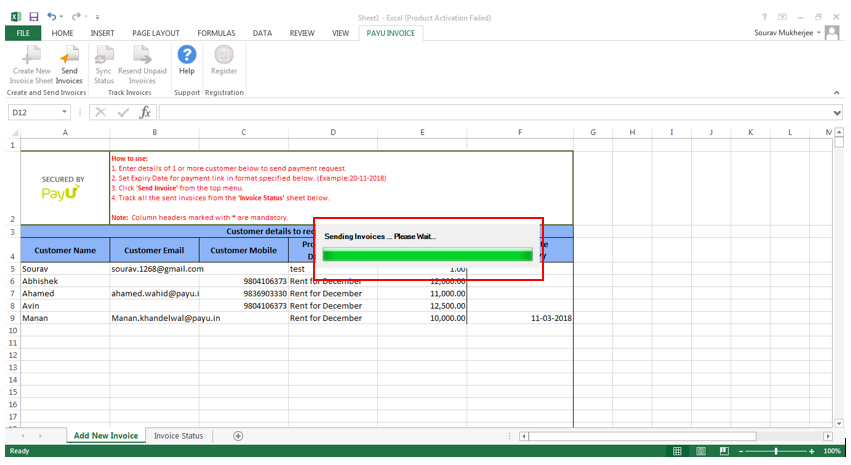
5. Once the invoices are sent completely, you will get a confirmation on the number of invoices you sent.
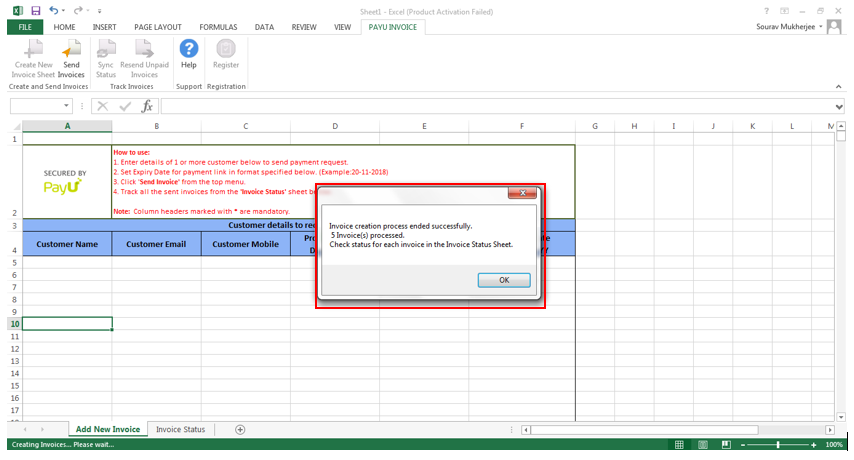
Please note that as soon as the invoices are sent, the ‘Add Invoices’ sheet becomes empty and all the customer information is captured in the ‘Invoices Status’ sheet.
6. You can view as well as track the status of the payment links right from this ‘Invoice Status’ sheet with no dashboard login. This is possible with the two new clickable buttons, ‘Sync Status’ and ‘Resend Unpaid Invoice’.

7. Click on’Sync Status’ button to get a date filter pop-up. Here, select the date range from which you want an update on the payments details.
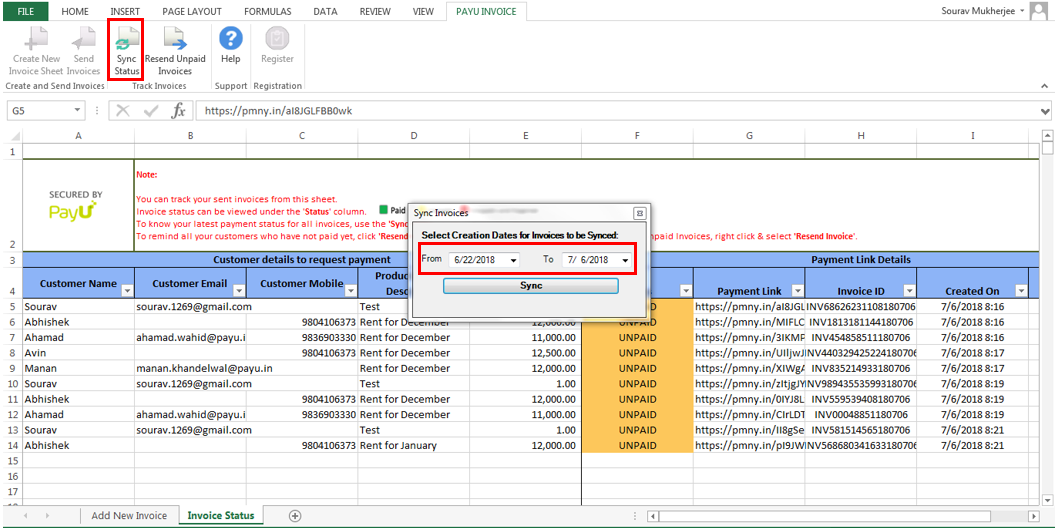
Now the selected payment links are refreshed with their payment statuses.
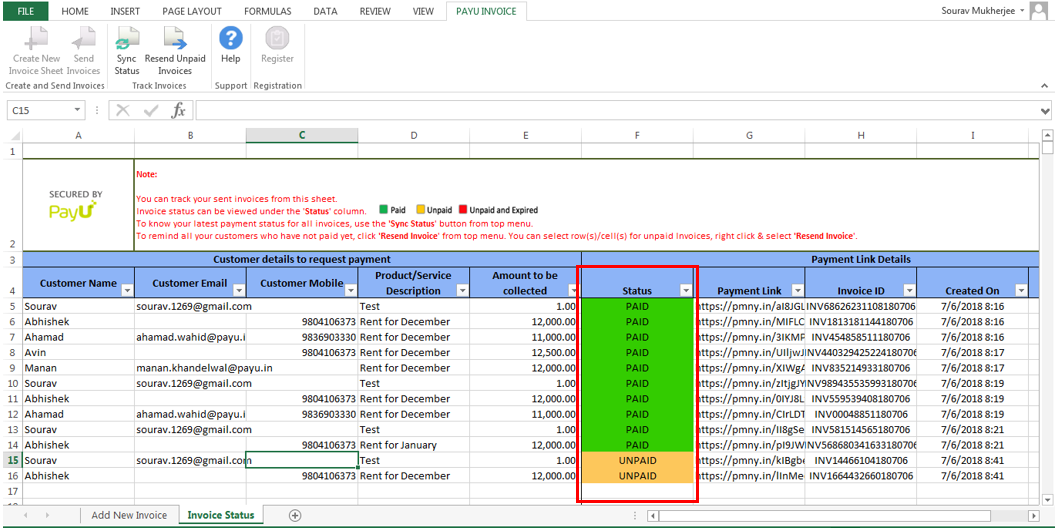
Please note that there are three statuses for payment links, ‘Paid’, ‘Unpaid’, and ‘Unpaid & Expired’. If you get the ‘Unpaid & Expired’ status then you need to create a new payment link.
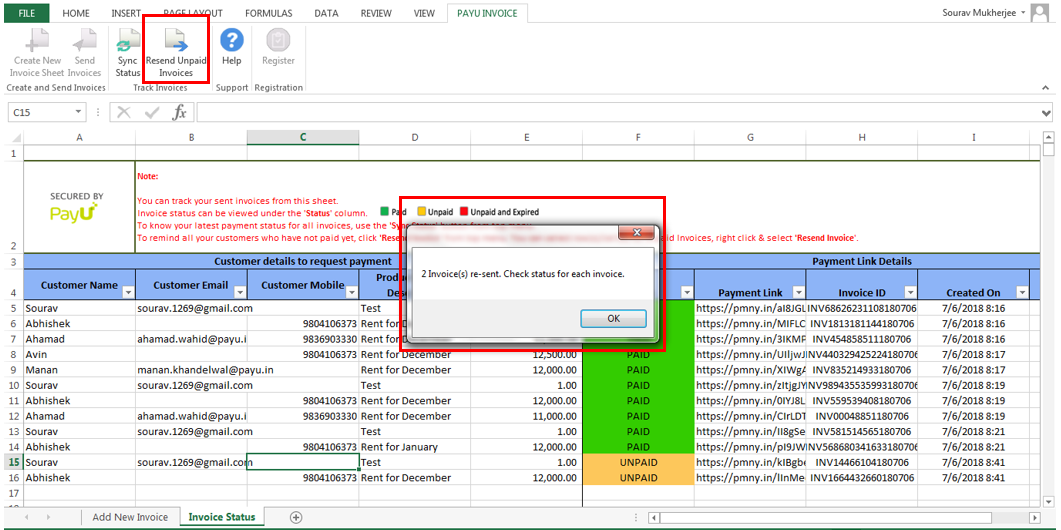
8. Click ‘Resend Unpaid Invoice’ to resend payment links to customers who have not paid.
Truly, using PayU Plugins is as simple as using an Excel. Starting from creating payment links, sharing the same via Email, SMS or both to tracking payment statuses (Paid, Unpaid, or Expired) – all of this can be done from your Microsoft Excel itself.
Grow your business effortlessly with ‘PayU Payments Plugin For MS Excel’ by simplifying the way you accept payments today!


Leave a Comment